Shipping containers are tough – you can turn them into storage, workspaces, even full-on homes. But here’s the thing: if your container isn’t level, you’re asking for trouble. Doors won’t shut right, water will start pooling where you don’t want it, and over time the whole structure will take unnecessary stress.
This guide consolidates expert tips and community experiences to walk you through the leveling process step-by-step.
Why Leveling Your Shipping Container Matters
Shipping containers are designed to rest on four corner castings. If one corner is off, the entire structure can become misaligned. According to Universal Containers, an uneven container can result in jammed doors, pooled water that promotes rust, and long-term damage to the structure.
A level base ensures:
- Even weight distribution
- Proper door functionality
- Water runoff and drainage
- Long-term structural integrity
Without leveling, you’re risking significant wear and tear that could compromise your investment.
Tools and Equipment Needed for Leveling
The tools required depend on your site conditions and the container size. Here’s a general list collected from multiple sources:
- Hydraulic jack or bottle jack
- Level (laser or bubble level)
- Wooden blocks, concrete blocks, or steel plates
- Shovel and rake (for site preparation)
- Crushed gravel or compacted soil (for base foundation)
- Booster blocks or container-specific leveling kits (e.g., from USA Containers)
If you’re setting up containers on bumpy ground or soft dirt, concrete pads or gravel bases are your best bet.
Step-by-Step Guide to Leveling a Shipping Container
Step 1: Prepare the Ground
Start by clearing the area where the container will sit. Remove debris, vegetation, and loose soil. You want a firm, compact surface.
Reddit user SiliconJunction emphasizes, “You really want to get the ground reasonably level first — it’s way easier than trying to jack the whole thing up later.”
Use a shovel, rake, and possibly a compactor to even out the base. If the site is too soft, add a layer of crushed gravel or road base and compact it.
Step 2: Decide on a Foundation
There are several foundation options depending on your needs:
- Concrete piers or footings
- Railroad ties
- Gravel pads
- Steel or concrete blocks
- Screw piles
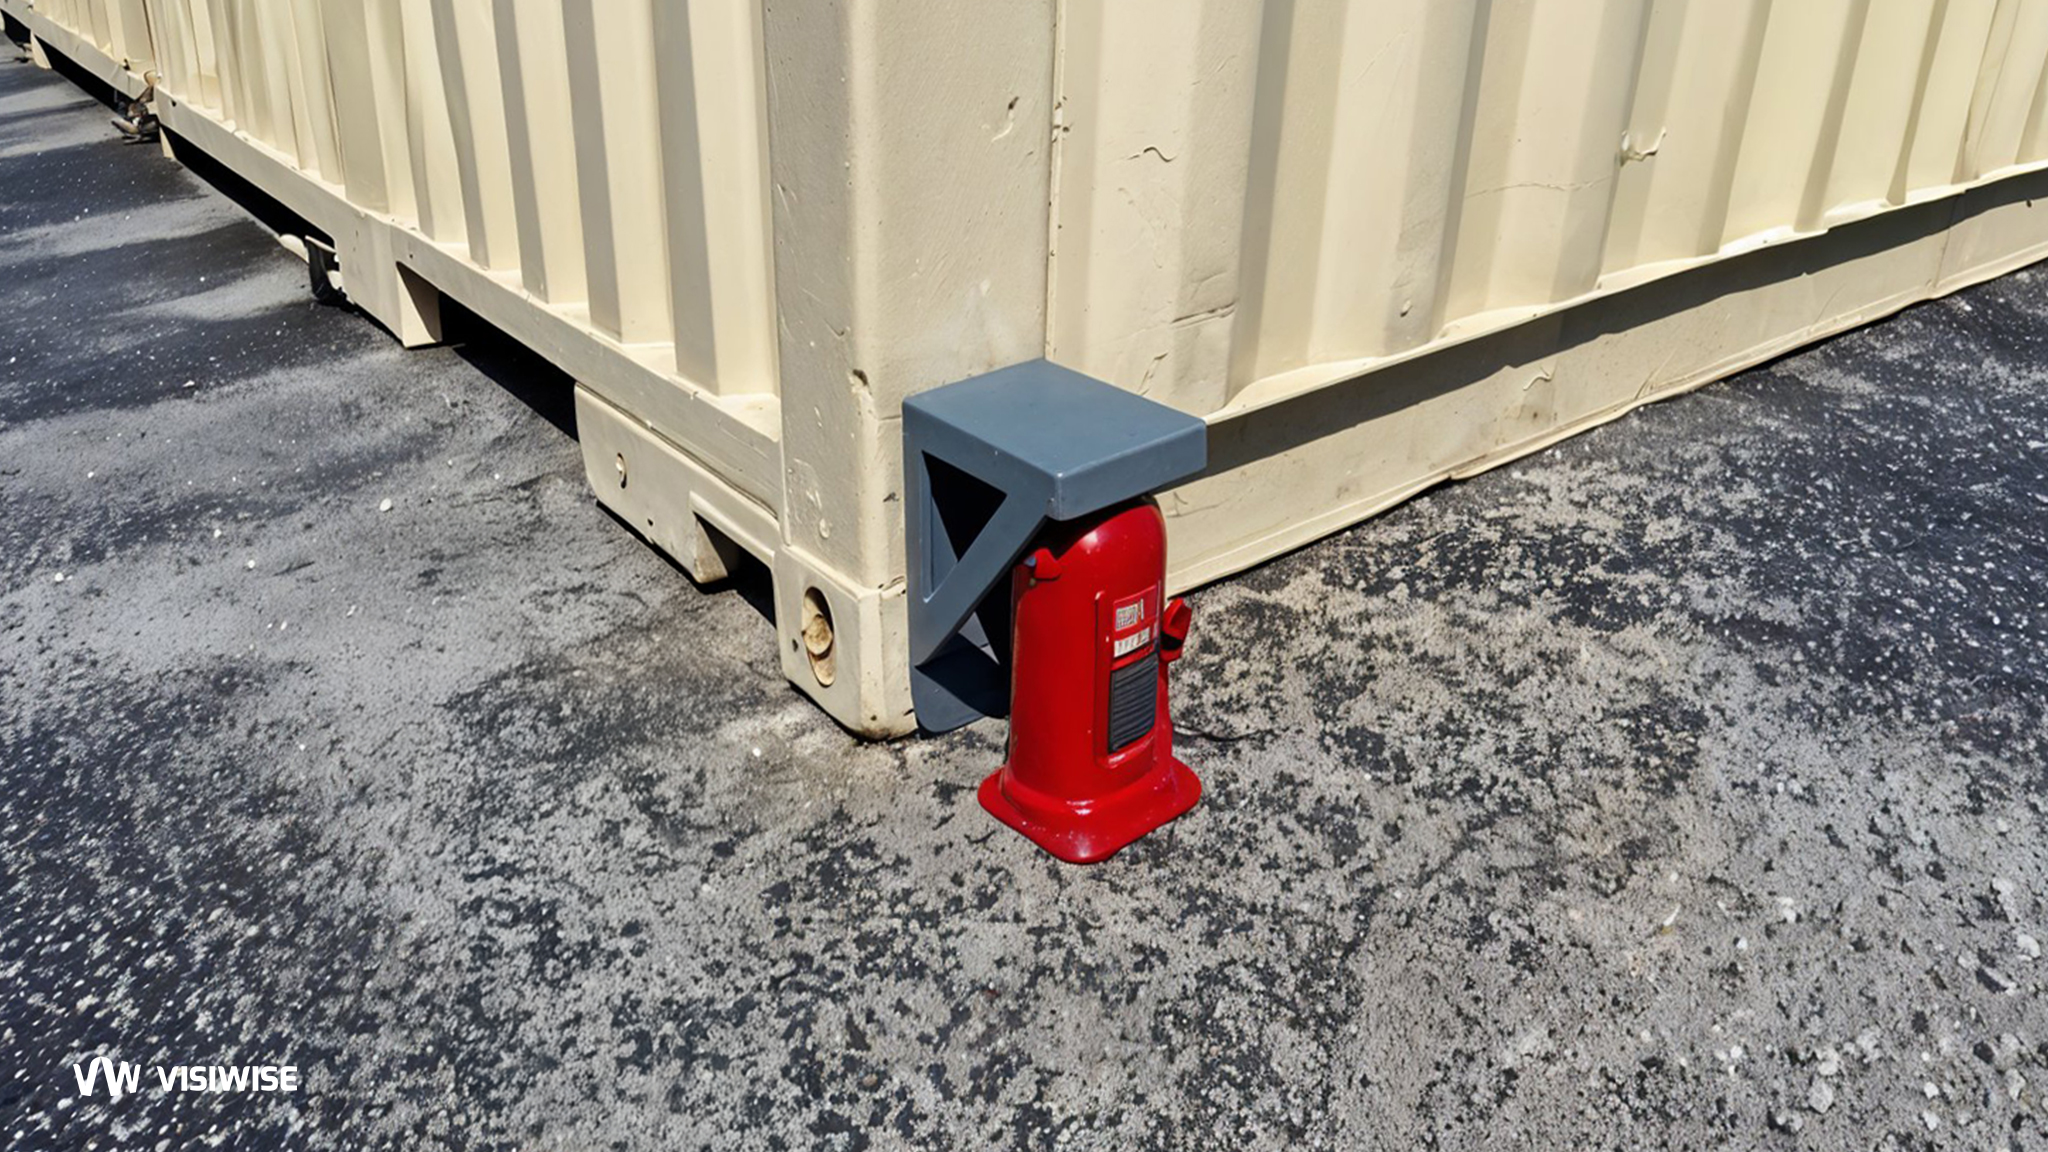
Step 3: Use Jacks to Adjust the Height
Once the container is placed on your chosen foundation, use a bottle jack or floor jack to lift corners individually. Be sure to lift slowly and safely. As you raise each corner, insert a block or booster under it to reach the correct height.
Use two jacks—one at each end—to adjust both sides simultaneously if possible.
Step 4: Check for Levelness
Place a level across the length, width, and diagonals of the container. Adjust your supports until the bubble is centered in each direction.
For extra precision, laser levels or digital inclinometers can ensure a perfectly flat base, which is especially important for multi-container setups.
Step 5: Secure the Base
Once level, make sure each support is secure and stable. Consider anchoring or grounding your container to prevent movement due to wind or shifting soil.
What Can Go Wrong and How to Handle It
Soft or shifting soil: Use a compacted gravel bed or install concrete pads.
Container twisting or warping: Only support the container at its corner castings, never in the middle, to avoid deformation.
Door misalignment: Happens when one side is higher than the other. Recheck your level and adjust corners as needed.
Water pooling: Ensure your site slopes slightly away from the container to encourage drainage.
Maintenance Tips for a Level Container
- Inspect periodically: Recheck level every few months, especially after heavy rain or frost.
- Check door alignment: Sticking or dragging doors may indicate a shift in level.
- Recompact gravel: If you’re using a gravel base, it might settle over time. Add and compact as needed.
- Watch for erosion: Keep an eye out for erosion under your supports and repair immediately.
FAQs
Does a shipping container really need to be level?
Yes, and here’s why:
- The metal frame can twist if uneven
- Doors won’t close properly
- It’ll wear out much faster
What’s the proper way to ground a container?
You’ve got two solid options:
1. Drive steel rods into the ground
2. Bolt it to a concrete base using the corner castings
How high should the floor be off the ground?
Most setups put it about 6 inches up when using:
- Concrete blocks
- Special piers
(But this changes based on your foundation type)
What should I put under my container?
Good choices include:
✓ Concrete pads (most stable)
✓ Compacted gravel (best for drainage)
✓ Pressure-treated timbers (budget option)
✓ Steel plates (for heavy loads)
Just keep the support even at all corners
How do I prepare the ground first?
Proper steps:
1. Clear all loose debris
2. Spread and level your base material
3. Compact it thoroughly
(Skip this and you’ll regret it later)
Is grounding actually necessary?
In most cases, yes – especially if you’re in:
- Windy areas
- Soft or unstable soil
- Places with extreme weather
Why use gravel underneath?
Three big benefits:
1. Prevents water pooling
2. Reduces moisture/rust
3. Provides better stability than bare dirt
What’s the absolute best foundation?
Depends on your situation:
- Permanent installation = concrete piers
- Temporary or movable = gravel pad
- Budget option = properly prepared compacted soil


